Useful Tips for Mastering Your VLE

Not yet fully acquainted with all the features of your favorite tool? Here are some practical tricks to save you time daily and help you become proficient in the ONE & NEO collaborative networks!
Getting Comfortable with the Mailbox
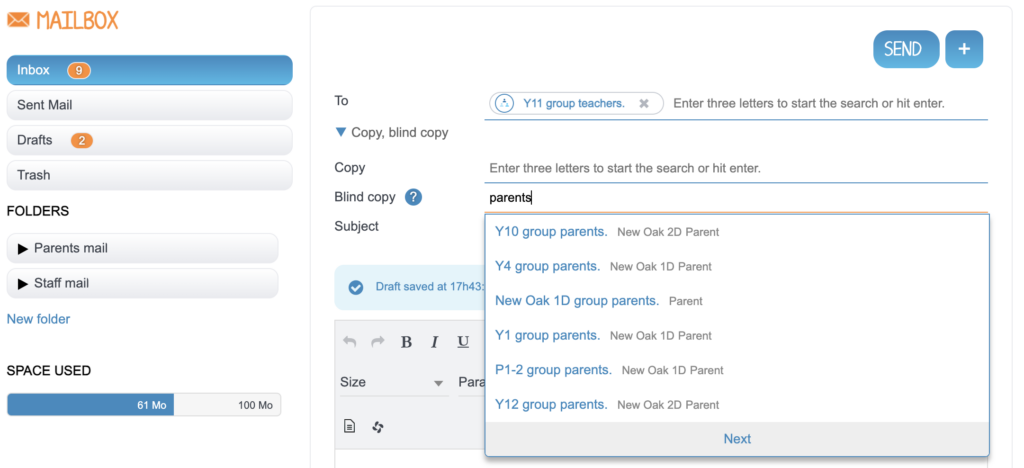
Sending emails with recipients in blind carbon copy
Do you want to send a message to multiple recipients without them being able to initiate a group discussion by clicking “reply all”? The messaging feature allows you to input the list of recipients in a “blind carbon copy” field, which can be expanded just below the standard recipient input field. You don’t need to specify a main recipient; you can send an email by simply filling in the “Copy” or “Blind carbon copy” fields.

Add an automatic signature to the end of all your messages
To save time, you can add an automatic signature in the Mailbox app. Click on the “New message” tab, then select “Add a signature.” From there, you’ll be able to include it at the end of all your emails with just one click. You can modify or delete your signature by clicking on the arrow, which will then display the signature text block.
Saving attachments to your online space from Mailbox
When you receive an attachment through Mailbox, you can save the file directly to your Filespace. In Mailbox, just click on the “Filespace” icon next to the attachment, then select your destination folder.
An Upgrade from Ctrl+Z: Wiki Restoration
When you make changes to a Wiki page, a new version is generated automatically. You can compare two versions of a page to see what content has been added or removed. Click on the “+” icon, then select “Versions.” A list of page versions appears, showing the date and author of each modification. You can compare two versions and opt to restore a previous version by clicking “Restore.”

Save time with Filespace
Commenting on documents
In Filespace, you have the option to leave comments on files. First, click on the document, then choose “Comment” from the menu below. If the file is shared with other users, they’ll receive a notification and can respond to your comment.
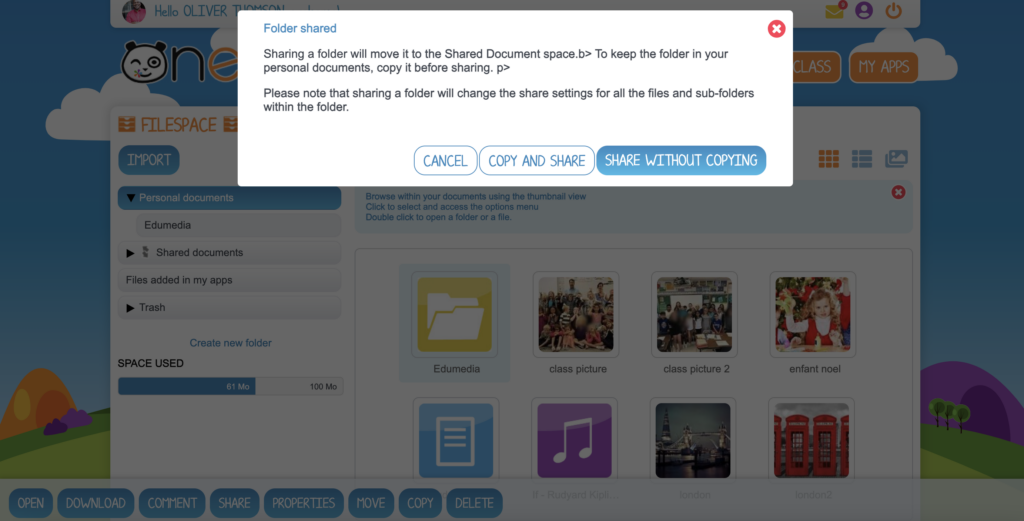
Creating shared folders
Rather than sharing documents individually, organize all your files into a single folder and share it! Note that when assigning permissions to a user in the sharing window (viewing, contributing, managing, or commenting), these permissions apply to all documents within the shared folder. Granting them contribution or management rights will allow members of your network to add their documents to the shared folder. For instance, you could create an empty folder and request that parents deposit the next permission slip there.

Mastering the Multimedia Notebook
Duplicating a page across all multimedia notebooks
You can duplicate a page from one Multimedia Notebook to the individual notebooks of your students. Simply open the notebook and click on “Edit”. Navigate to the page you want to duplicate and click on the “+” button. Then, select all the notebooks you desire; the page will automatically be added to the end of each one. If your students wish to rearrange the page order, they can easily do so by clicking on “Page Order” and dragging and dropping pages to move them forward or backward.
Collaborating together in real time
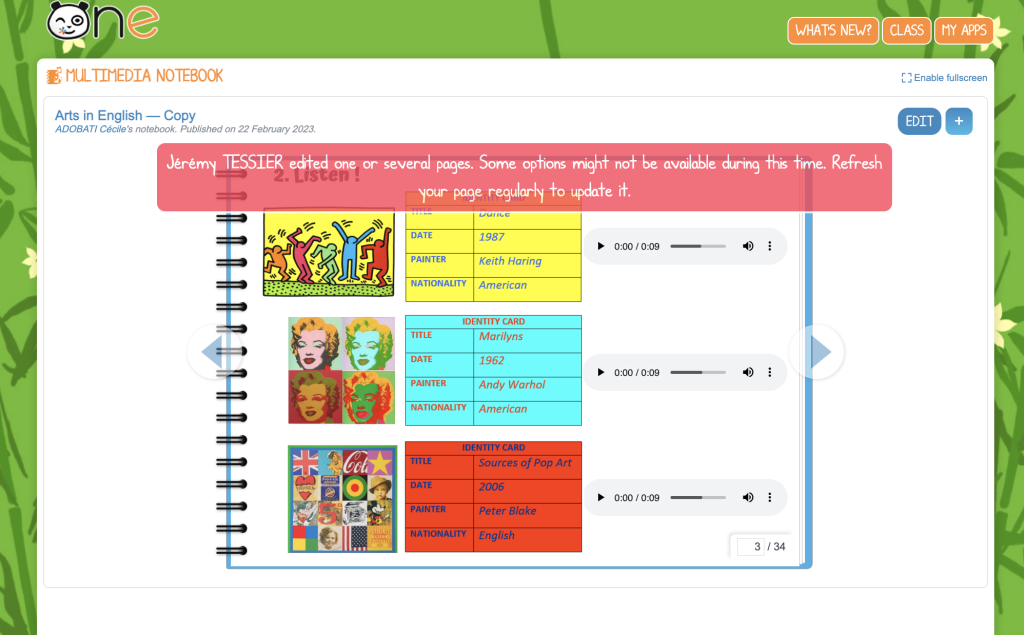
Users can edit a Multimedia Notebook simultaneously with others. Saving occurs on a per-page basis rather than for the entire notebook. For example, you can create collaborative content with all the students in your class. To do this, share the notebook with contribution rights, allowing your students to edit and add pages as needed.

Exporting your Multimedia Notebook in HTML format
With HTML export, you can view and keep a copy of your Multimedia Notebooks outside of the ONE & NEO collaborative networks. Unlike a simple PDF document, HTML format allows access to all multimedia content, including videos, audio recordings, links, etc. Simply click on “Export”, and the file will be available on your device. Choose the “Index” file from the opened folder. On Windows, be sure to extract the ZIP folder by right-clicking and selecting “Extract All”.
Set up sharing favorites
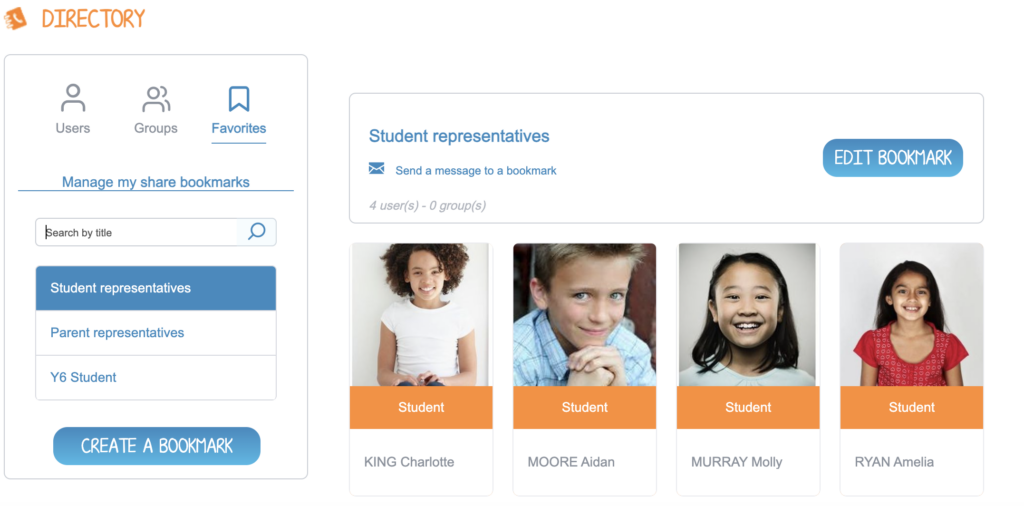
Looking to streamline your content sharing process? Save your frequently used contact lists as “Sharing Favorites” directly from the sharing window. You can also edit existing lists or create new ones using the Directory application. With this feature, when you share content, you won’t need to enter recipients individually anymore; simply select your favorite contact list. This functionality is especially handy for multi-level classes.

Take control of your schedule with Agenda
Sharing an event
It’s not just calendars that can be shared. If you prefer a more flexible and occasional solution, create an event in the dedicated application and share it. This event will automatically appear in their personal calendar. They can then read, reshare, or delete it based on the permissions granted.
Limiting access to content
However, it also works the other way around! In a shared calendar with multiple users, if you don’t want everyone to see an event, simply click “Save and restrict” when creating it. Then, in the sharing window, select the specific group you wish to share the event with.
Setting up a recurring event
Plan to swim every Thursday afternoon for six months? Make this event recurring in your personal or shared calendars; you’ll find the option when saving an event. This functionality is also available in the ONE workbook, where each assignment or activity can be marked as recurring based on the chosen timeframe.
All About the VLE, Anytime
Online assistance is your ultimate companion. Regardless of where you are within ONE, simply click on the red question mark in the top menu bar. A window will then appear, providing you with a user manual for the application you are currently using! No need to search any further—everything you need is right here.
comments
Add comment